Tomcat高效响应的秘密(一)

在访问网站的时候,你也许曾尝试过或曾听说过,为了提高性能,节省带宽,我们把一些资源文件进行压缩,合并等,来实现上述目的。同时,应用服务器为了节省带宽,也会根据客户端可以接受的压缩类型进行资源的压缩,这样资源在回传到客户端时,再进行解压渲染即可。
例如,我们请求时,请求头可能是这个样子:
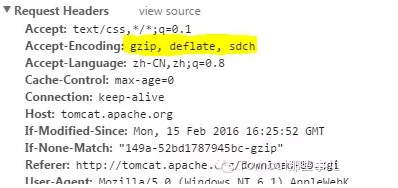
在Accept-Encoding中,注明了支持的压缩类型。
对应的响应头,我们会看到下面的内容:

我们看到,服务器通过Content-Encoding,注明服务器使用gzip方式进行了压缩。
请求响应相关的内容,前面写到过:
在Tomcat中,对于这种资源的压缩也是支持的。配置项是Connector组件的compression属性。
我们来看官方文档的注释
The Connector may use HTTP/1.1 GZIP compression in an attempt to save server bandwidth. The acceptable values for the parameter is “off” (disable compression), “on” (allow compression, which causes text data to be compressed), “force” (forces compression in all cases), or a numerical integer value (which is equivalent to “on”, but specifies the minimum amount of data before the output is compressed). If the content-length is not known and compression is set to “on” or more aggressive, the output will also be compressed. If not specified, this attribute is set to “off”.
如果不指定,默认是off状态,支持off,on,force或者数字。
同时,在注释下,还有一小段文字,注明除压缩之外的另一个选择,即sendfile功能。
Note: There is a tradeoff between using compression (saving your bandwidth) and using the sendfile feature (saving your CPU cycles).
对两者而言,compression节省带宽,而sendfile节省CPU。但有些Connector是不支持sendfile功能的。在支持该功能的Connector中,默认是开启的。默认大于48Kb的静态文件,会直接使用sendfile功能进行传送,而不再启用压缩。如果权衡两者,要关闭sendfile功能,可以使用useSendfile属性,或者在conf/web.xml中把默认的阈值改大一些。
而sendfile之所以高效的原因,我们来看这里
long written = sd.fchannel.transferTo(sd.pos,sd.length,wc);是基于NIO,使用了channel的transferTo方法,这个方法有什么作用呢?
我们来看OpenJDK中,该方法的内容:
  public long transferTo(long position, long count,
                           WritableByteChannel target) {
     ...
        // Attempt a mapped transfer, but only to trusted channel types
        if ((n = transferToTrustedChannel(position, icount, target)) >= 0)
            return n;
   }
private long transferToTrustedChannel(long position, int icount,
WritableByteChannel target)
{
// Trusted target: Use a mapped buffer
MappedByteBuffer dbb = null;
try {
dbb = map(MapMode.READ_ONLY, position, icount);
return target.write(dbb);
}最终的高效处理,是通过NIO的MappedByteBuffer来实现的。就好比我们在运输东西的时候,省去了卸载后重新装车的过程,效率提高了不少。
我们前面写到,compression默认是关闭的,而且开启后,如果达到了sendfile的条件,也是优先使用sendfile,这一部分逻辑的控制如下,而且本身compression默认只支持纯文本,代码中预置的mimeType只有三种:
// Sendfile support
        boolean sendingWithSendfile = false;
        if (getEndpoint().getUseSendfile()) {
            sendingWithSendfile = prepareSendfile(outputFilters);
        }

        // Check for compression
        boolean isCompressable = false;
        boolean useCompression = false;
// 注意下面判断的条件中,包含了是否使用sendfile的项
        if (entityBody && (compressionLevel > 0) && !sendingWithSendfile) {
            isCompressable = isCompressable();
            if (isCompressable) {
                useCompression = useCompression();
            }
        }
这行代码if (entityBody && (compressionLevel > 0) && !sendingWithSendfile)判断的项有很多,其中compressionLevel即compression的配置是属于on/off/force这些,每个对应一个level,sendingWithSendfile则对应是否已使用sendfile,而entityBody则根据response的响应码来进行判断,如果是以下几种情况,则也不会使用compression
int statusCode = response.getStatus();
if (statusCode < 200 || statusCode == 204 || statusCode == 205 ||
        statusCode == 304) {
    // No entity body
    getOutputBuffer().addActiveFilter
        (outputFilters[Constants.VOID_FILTER]);
    entityBody = false;
    contentDelimitation = true;
}
判断是否需要compression的逻辑,即未经压缩,且超过设置大小的内容。
private boolean isCompressable() {

        // Check if content is not already gzipped
        MessageBytes contentEncodingMB =
            response.getMimeHeaders().getValue("Content-Encoding");
        if ((contentEncodingMB != null)
            && (contentEncodingMB.indexOf("gzip") != -1)) {
            return false;
        }
        // If force mode, always compress (test purposes only)
        if (compressionLevel == 2) {
            return true;
        }

        long contentLength = response.getContentLengthLong();
        if ((contentLength == -1)
            || (contentLength > compressionMinSize)) {
            if (compressableMimeTypes != null) {
                return (startsWithStringArray(compressableMimeTypes,
                                              response.getContentType()));
            }
        }
        return false;
}我们看,代码中对于compression的处理,会添加响应头Content-Encoding,同时在OutputBuffer中增加了一个GzipFilter,
if (useCompression) {
    getOutputBuffer().addActiveFilter(outputFilters[Constants.GZIP_FILTER]);
    headers.setValue("Content-Encoding").setString("gzip");
}那Gzip在输出的时候,做的就是下面的工作:使用GZIPOutputStream进行输出
public int doWrite(ByteChunk chunk, Response res)
    throws IOException {
    if (compressionStream == null) {
        compressionStream = new GZIPOutputStream(fakeOutputStream, true);
    }
    compressionStream.write(chunk.getBytes(), chunk.getStart(),
                            chunk.getLength());
    return chunk.getLength();
}
总结起来,Tomcat为了将响应用户的请求,同时又从节省带宽和CPU的角度,提供了一些功能与配置。就sendfile这个功能来说,Nginx中同样也提供类似的功能,实现原理我想应该也基本一致。
扫描或长按下方二维码,即可关注!